57. Beacons
 In virtual pin cab
parlance, a beacon is a rotating or flashing light like you'd find on
a police car or ambulance. Beacons make good backbox toppers, since
they're the right size, and they can play an active role in the light
show. They're also a good simulation feature, since lots of real
pinball machines featured beacon topers.
In virtual pin cab
parlance, a beacon is a rotating or flashing light like you'd find on
a police car or ambulance. Beacons make good backbox toppers, since
they're the right size, and they can play an active role in the light
show. They're also a good simulation feature, since lots of real
pinball machines featured beacon topers.
Parts: The only part needed is the beacon itself, which you can
buy as a ready-made product. I haven't seen any good DIY designs,
probably because it's pretty easy to find off-the-shelf products that
fill the bill.
The thing to look for is "police beacon" or "rotating beacon light".
You can look for these on Amazon or eBay, but unlike most product
categories, neither site tends to have very good options. The ones
you'll find on either site are mostly "disco" or "party" lights -
novelty toys, which won't be very bright or realistic. So instead of
looking at a general retailer, you might try specialty automotive
supply stores, such as
Vehicle Safety
Supply.
A particularly good option that I've found is the Peterson 771
series. I use a pair of these on my cab. They're inexpensive (about
$25 apiece), they're exactly the right size and shape, they feature a
traditional motorized rotating light with directional reflector, and
they're available with red, blue, or amber lenses. They're a perfect
fit for this job. To find them, search on the Web for Peterson
V771A for amber, V771B for blue, and V771R for red.
Another option is the very similar looking Wolo Manufacturing 3100
series: 3100-A (amber), 3105-B (blue), 3110-R (red). I haven't seen
these in person, but from the pictures and specs, they look
essentially identical to the Peterson V771 series. They might even be
the same thing under a different brand name. Current prices are about
$20 per unit.
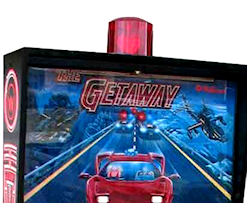
Beacons mounted on my cab's backbox, one
red and one blue. These are off-the-shelf items, Peterson
model 771, available from automotive supply sites.
Mounting: Many of the beacons you'll find (including the
Peterson 771) come with magnetic bases that are intended to hold the
light to the roof of a car. You'll probably want to remove the
magnetic base and attach the light to the top of your backbox with
screws or other wood fasteners. You could alternatively glue them in
place, although I try to avoid glue as it can't be easily removed if
you ever need to replace the device.
Wiring: Check with your product's documentation to be sure, but
anything automotive generally runs on 12V DC. That works well in a
pin cab because we usually have a 12V supply available from a
secondary ATX power supply; see Power Supplies for Feedback for more on
that.
Follow the generic wiring plan in Feedback Device Wiring:
- If your beacon has a motor, be sure to connect a diode between the (+) and (-) leads of the beacon, with the striped side of the diode connected to the (+) lead of the beacon, as described in Coil Diodes. This is required if there's any sort of motor or coil in the device. Any beacon with a rotating light has a motor inside to drive the rotation.
- Connect +12V from your power supply (the yellow wire for an ATX power supply) to the (+) terminal of the beacon
- Connect the (-) terminal of the beacon to an available output port on your output controller
The beacon might not have specific (+) and (-) terminals. If not,
the order of the connections probably doesn't matter.
Electrical interference: If you're using a mechanical beacon
with a motor that drives the rotating light, be sure to use a diode as
mentioned above. If you still have problems with electrical interference
when it runs (for example, USB devices randomly disconnect, or you see
random keyboard input on the PC), you might need to add more filtering.
The two-inductor filter described for the shaker should work here. See "Electrical
Interference" in Shaker motors for
the wiring and parts details.
Check the power: You should check your beacon's power usage to
make sure that your output controller can handle the load. The
beacons I use draw about 500mA each, so the pair of them requires
about 1A. If your product's documentation doesn't specify the power
draw, you can test it yourself using an ammeter.
For Pinscape expansion boards: It should be safe to connect any beacon
to any MOSFET Power Board output. Those outputs can handle up to
about 4A. Nearly any beacon should be well under 1A. It's best to
check (measuring with an ammeter if necessary) if you're not sure,
though.
If you're using an LedWiz: It's safe to connect a beacon directly to
an LedWiz output if the device draws less than 500mA. If it's
above 500mA, you'll need some sort of "booster". See "Power Limits"
in LedWiz Setup.
DOF setup: In the DOF Config
Tool, go to your Port Assignments page. Find the output
controller port number where you wired the beacon. Assign this
to "Beacon".
Increasing the brightness: Most of the rotating light beacons
you'll find come with small incandescent bulbs. If your cab includes
flashers and strobes, the beacons might look dim and
unimpressive in comparison. This isn't really the beacons' fault;
it's more that the LED devices we use for flashers and strobes are
extremely bright. They'll put a little incandescent bulb to shame
(especially with the darkly tinted plastic dome covering it).
You can increase the brightness somewhat by installing an LED bulb in
place of the incandescent that your beacon comes with. Most of the
beacons use common automotive bulb types for which LED replacements
are readily available. Almost all automotive light bulbs run on
12VDC, so the main trick is to figure out the type of socket base that
your beacon uses, so that you can find a bulb that fits. Check your
beacon's instructions, or just look at the bulb itself. The bulb type
is often printed or embossed somewhere on the metal base of the bulb.
The Peterson model 771 beacons use bulbs with socket type 1156, also
known as BA15S. Any LED replacement bulb with the same base and a 12V
supply voltage should work.
In case you were wondering, you don't have to add extra
resistors if you switch to LED bulbs. If you've read the chapter on
LED Resistors, you know that "bare" LEDs require resistors
in the circuit to limit the power going through them. But we're not
talking about bare LEDs here; we're talking about LED replacements for
incandescent bulbs. Any LED bulb that's designed as a plug-in
replacement for an incandescent bulb has the necessary resistors built
in, so no external resistors are needed.
If you install an LED, and the motor runs but the LED won't light up,
you might need to reverse the polarity of the power supply connection
to the beacon. Incandescent bulbs aren't polarized, but LEDs are. If
the LED bulb won't light, try swapping the (+) and (-) leads connected
to the beacon. This might also have the effect of reversing the
direction of the motor, but it should make the LED light up.
Warning: if you've attached a diode to the beacon (required if
your beacon has a motor), be sure to reverse the diode at the same
time that you reverse the voltage polarity.
Another thing you can do to improve the apparent brightness
of the beacons is to supplement the beacons with some additional
red and/or blue strobe lights. The "22-LED strobes" recommended
in Flashers and Strobes also come in red and blue varieties. So:
- Buy a 22-LED blue or red strobe, matching the color(s) of your beacon(s)
- Mount it on top of your cab next to or behind the beacon, facing the ceiling
- Unlike the advice for strobes in Flashers and Strobes, do use the little control box that comes with the strobe panel, so that the LEDs flash when the beacon is activated rather than turning on continuously.
- Wire the control box to the same output port as the beacon, so that the LEDs start flashing whenever the beacon is running
- Make sure that the added power of the LED panel doesn't overload your output controller port. If the combined load would be too great, use a second port for the strobe panel instead, assigning it in the DOF configuration to the same "Beacon" device.
The added LED panel obviously won't increase the actual brightness of
your beacon, but it will increase the overall amount of flashing red
or blue light during a beacon display, which will create the
impression of a brighter beacon. I recommend this approach because I
use something like it myself to good effect. (My setup is a little
more custom, but it's basically the same idea. I use some extra LEDs
around the perimeter of my custom fan housing instead of the 22-LED
panels, and I use a custom-programmed flashing pattern controlled by a
Teensy microcontroller.)
