43. Finishing Touches
Should you ever find yourself in a position where you're finished with
your virtual cab and can't think of any more work to do on it, here are
some miscellaneous ideas for extras, Easter eggs, and final polishing
work.
Apron
If you installed your playfield TV with a setback from the front of
the cabinet to make room for the plunger, you'll need something
cosmetically appealing to fill the space. My preference is to make
this area resemble a pinball "apron", since that's what you'd find in
the same space on a real machine.

The apron from Space Station (Williams, 1987). This
is a fairly generic apron, with the Williams logo and some
simple stripes for decoration. Most aprons from the era used
the same overall shape and size, but many from the 1990s
had custom graphics tied to the game theme in place of the
generic logo and stripes.
We can't precisely replicate this look for a virtual cab, since
we don't want that "V" shape that funnels the balls into the trough at
the center. We just need a simple rectangular shape, to fill the area
between the front of the cab and the bottom of the TV. But we can
still duplicate the whole bottom section, which has the most
distinctive visual elements anyway - the card inserts and center logo
graphics.
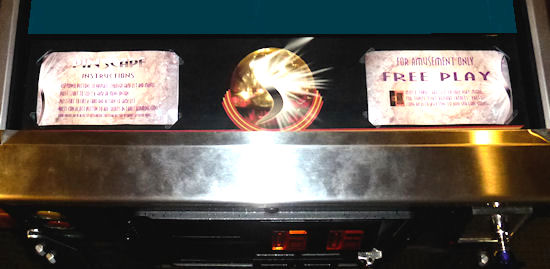
The "apron" from my virtual pin cab, filling the space between
the front of the cabinet and the TV.
Live card monitors
If you want to get really elaborate with the apron, replace one or
both of the cards with displays. Real pinball instruction cards are
around 6" wide by 3.25" high (that's the exact size for Williams games
from the 1990s, and other manufacturers used slightly different sizes
in the same range), which is very close to the size of a 6" diagonal
16:9 display. And you can actually buy LCD screens in that size -
they make them for microcontrollers like the Raspberry Pi.
This is an extremely uncommon feature (I've only heard of one cab
builder who's implemented it), so it's not all that well supported in
the virtual pinball software suite. My own
PinballY front end has
built-in support for it, but that's about it as far as I know. I
think it would be pretty easy to come up with your own custom software
to keep it in sync, though, since all you need to do is display a
static image each time a game is started.
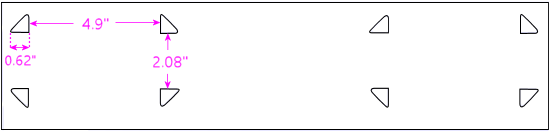
How to construct an apron
On the real machines, the aprons are made of sheet metal, and typically
have a smooth satin finish with silk-screened graphics or decals.
The virtual cab equivalent is such a simple shape that you can easily
make it from a thin piece of plywood or particle board. However, it
can be hard to get the right finish that way, since you'll probably
end up with visible wood grain (even if you cover it with a decal for
the graphics).
Another option is to make it out of sheet metal, if you have the tools
for that. The finish is easier to get right, since the real ones use
sheet metal as well.
I made mine with laser-cut acrylic. That let me cut the diagonal
openings to hold the corners of the cards, to better match the look of
the real machines. I faced it with a custom-printed decal - the same
sort used for the cabinet itself. The combination of acrylic and the
decal has exactly the right finish to match the originals.
Here are the dimensions I used for the corner cutouts. These are
sized for the 6" x 3.25" instruction cards that Williams used on their
machines in the 1990s. I'm leaving out the overall dimensions since
you'll almost certainly need to adjust it to fit your cab. The
overall width should be just slightly (about 1/4") less than the
inside wall-to-wall width of your cab, and the height should be about
the same as the distance from the lockbar receiver to the TV. (You
want the lockbar to cover the bottom of the apron, for a seamless
appearance, with no gap between the lockbar and apron.) Position the
two instruction cards as you see fit, but I'd balance them so that
they're at the same inset from their respective outside edges.
Instruction cards
Instruction cards on the real machines vary by manufacturer, so you
don't have to match an exact size to look authentic. For reference,
the Williams cards from the 1980s and 90s are 6" wide by 3.25" tall.
Traditionally, the left card has playing instructions, with a summary
of the game's rules, and the right card is the pricing card, with the
price per game, number of balls per play, and the obligatory "For
Amusement Only" disclaimer.
You can find many examples of instruction and pricing cards for the
real machines online by searching for "pinball instruction cards".
There are some sites with collections of the original cards and
fan-made custom versions. The original manufacturer cards were
usually printed in black text on a white card, usually in a pretty
plain style with minimal (if any) graphics. A lot of collectors these
days like to replace the boring originals with fancier custom versions
featuring full-color graphics based on the game's theme, so a lot of
those are in circulation as well.
For a real game, the instructions card summarizes the scoring rules
for the game; for a virtual cab, you'll probably want to summarize how
to operate your game selection menu system instead. And the pricing
card is usually a simple "Free Play" announcement. To give you some
more specific ideas, here are the cards I created for my cab. You
won't want to use them as-is, since they're so customized for my
graphics theme, but maybe they'll be helpful starting points.
Sample virtual cab instruction card. The instruction card
is traditionally displayed on the left side of the apron.

Sample virtual cab pricing card. The pricing card is
traditionally displayed on the right side of the apron.
Maintenance labels
It's a really good idea to label anything on the inside of your
cab that's not pretty obvious just looking at it. That'll be a
big help later on if you ever have to repair anything or if you
want to make any upgrades. Do this while you're building the
machine or shortly after you're done, while things are still
fresh in your mind. Some things that are helpful to label:
- Wire harnesses and pluggable connectors. Put a label on each connector saying what it's for and where it plugs in.
- Wires going to screw terminals. Mark which terminal they connect to.
- Power supplies. Label each one's main function ("PC power supply", "feedback device 24V supply", etc).
- Power supplies with adjustable voltages, and adjustable step up/down voltage converters. Label with the purpose ("shaker motor speed control") and the voltage that you've determined as the correct setting.
- High voltage warnings. Put a high voltage warning label near any exposed wires or terminals with anything above about 24V. A general "High voltage inside" warning might also be appropriate; the real machines feature a label like that on the lockbar receiver.

- Other warnings. Label anything else that you know to be hazardous, so that if anyone else tries to do any work inside, they'll know where they need to be careful.
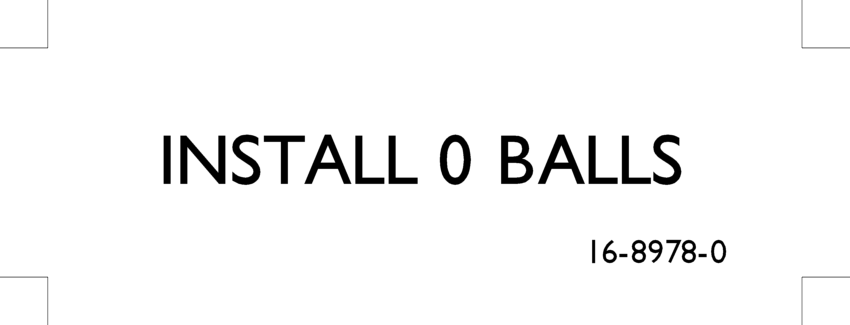
Install 0 balls
This is just a little pinball-nerd joke. On the real machines, there's
always a label on the top of the lockbar receiver (the metal part on
the inside of the front wall that latches the lockbar in place)
telling the operator how many pinballs the game takes, in case
they were removed for transport.
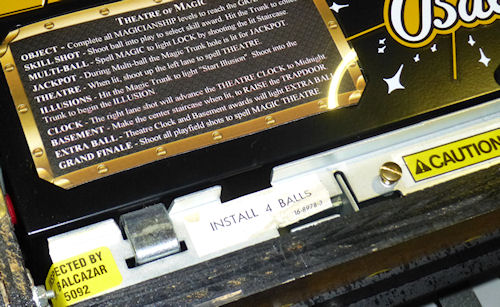
"Install 4 balls" label, from Theatre of Magic (Bally, 1995)
For a virtual pin cab, the right number is, of course, zero. It makes
a cute Easter egg for your pinball collector friends when you're giving
a behind-the-scenes tour.
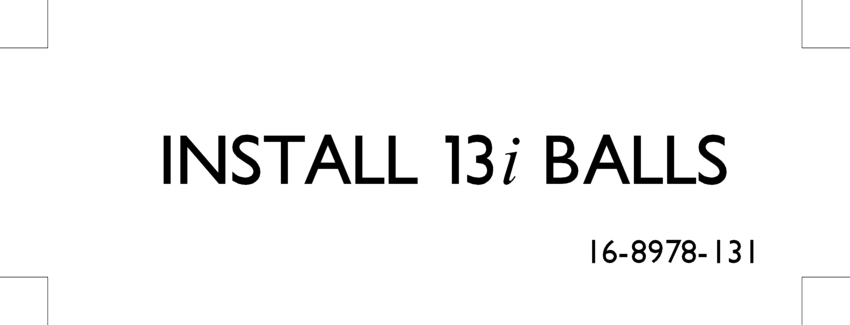
Here's the Math Nerd variation. It's based on the assumption that the
largest "imaginary" number of balls you'd ever have to install would
be the number needed to accommodate the virtual version of Apollo 13
(Sega, 1995), with its rather silly 13-ball multiball mode.
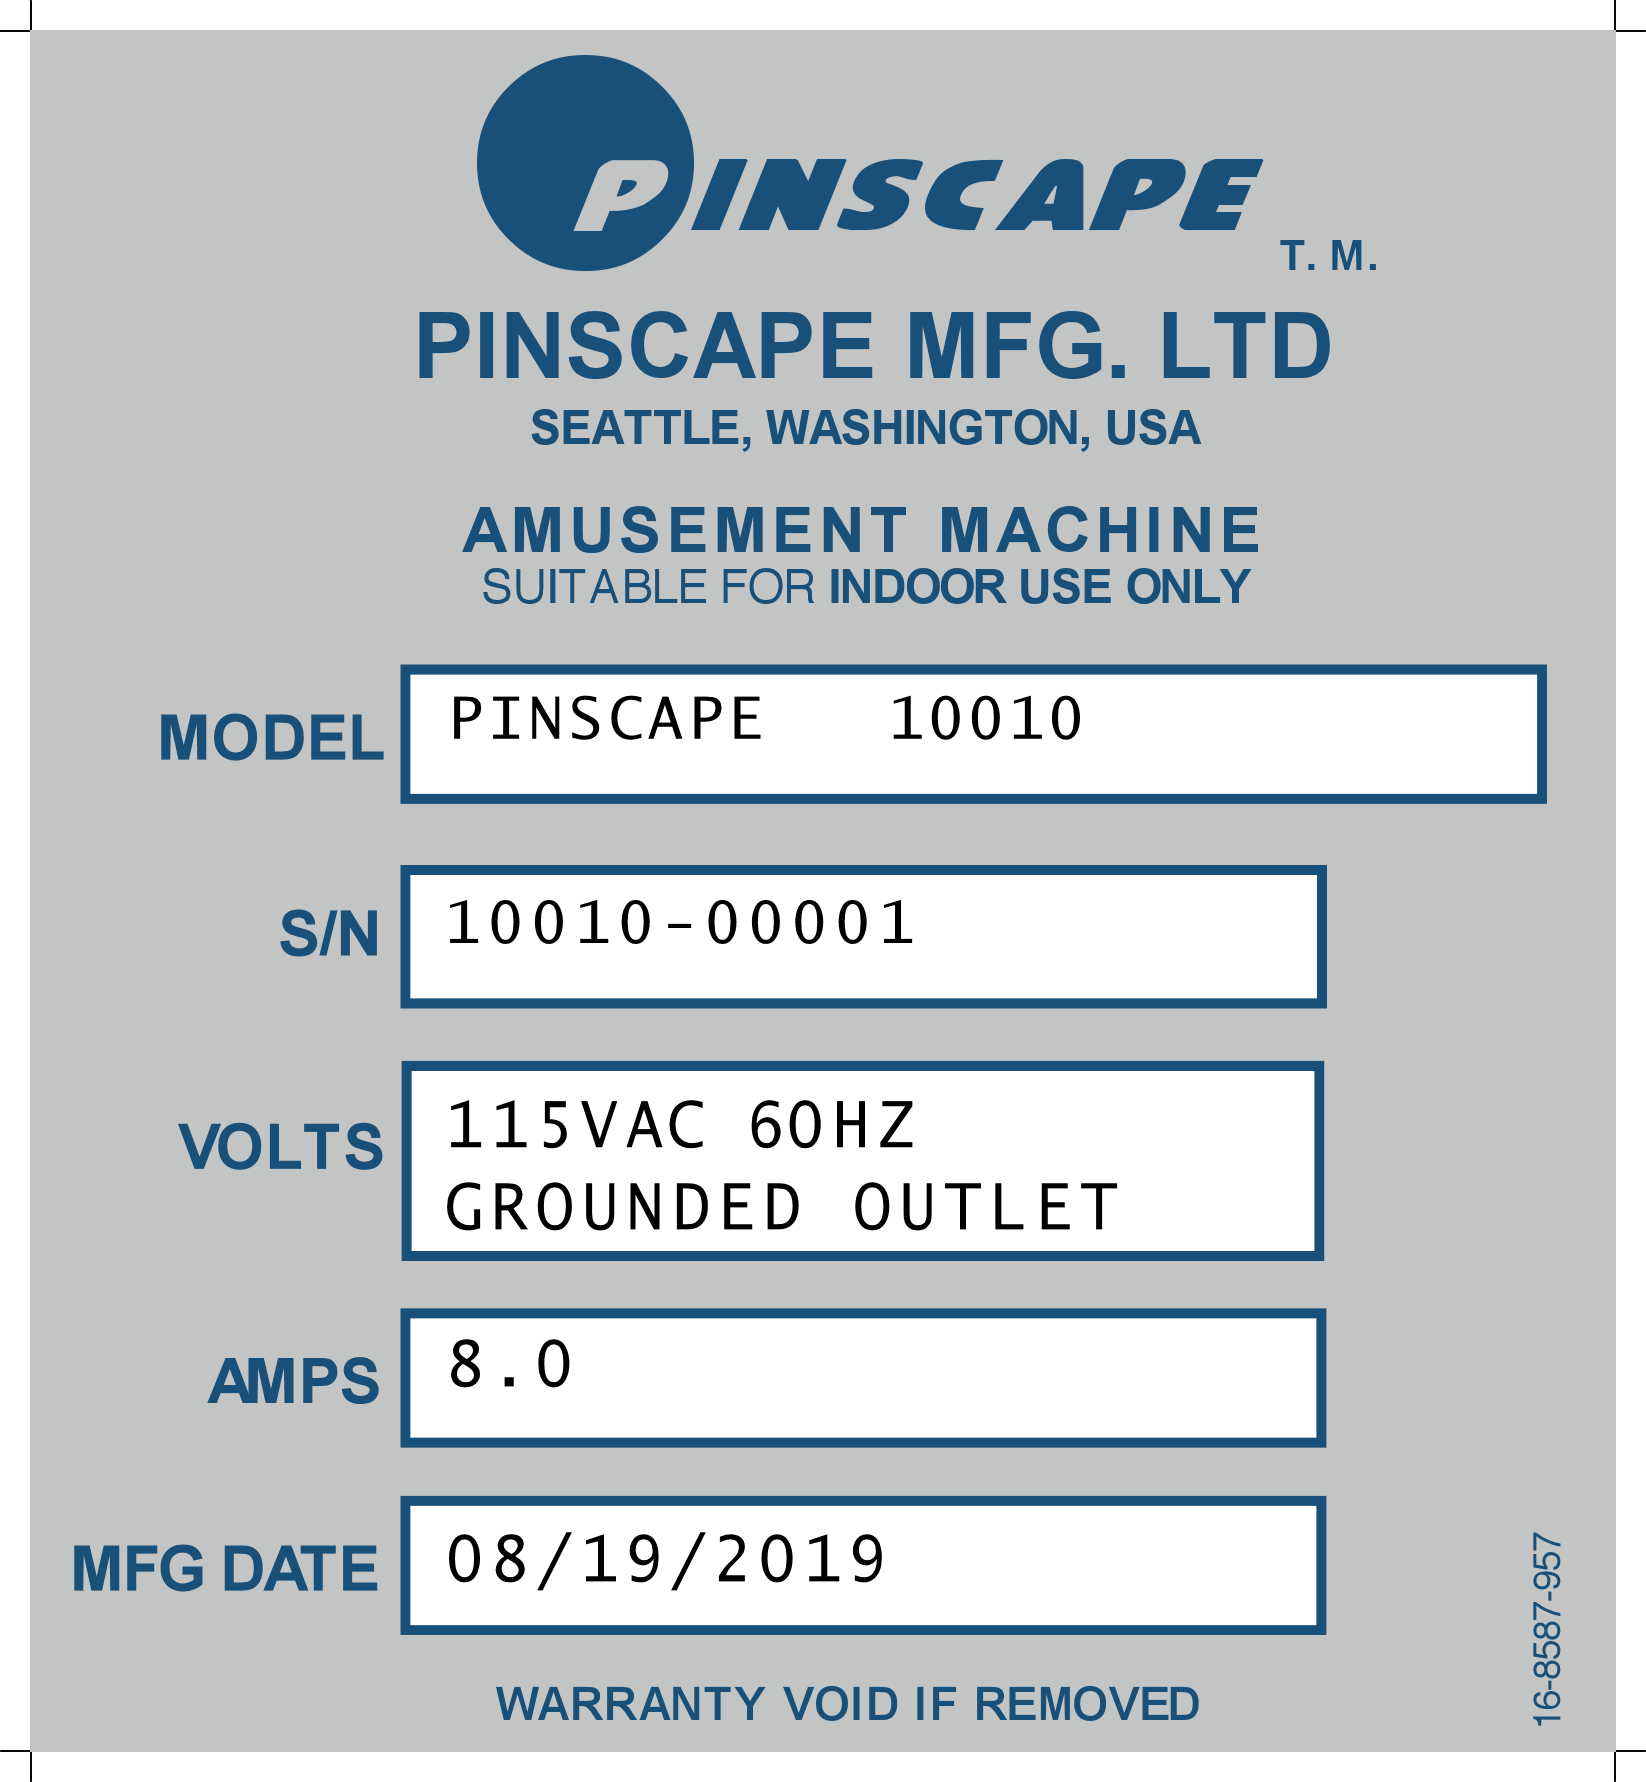
Manufacturing label
Real machines have a product label on the outside back of the main
cabinet, at top left, listing the manufacturer, model number, serial
number, etc.
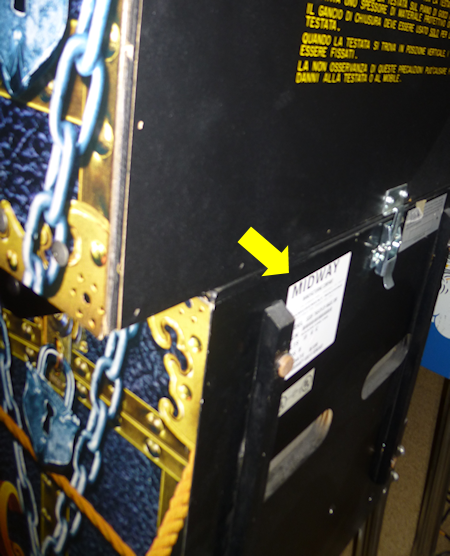
The manufacturing label on the back of a 1990s WPC machine,
at arrow.
(The other two stickers are a UL approval label and
an FCC approval label for radio-frequency emissions. I wouldn't
advise imitating official certifications; let's
just say that we'd like to avoid any Imperial entanglements.)
Here are a couple of mock-ups of the layout of these labels, to use as
a model for creating your own. The styles are typical of the WPC
machines of the late and early 1990s, respectively. These are usually
printed at around 4"x4" to 5"x5".

If you want to be really thorough, there's usually a second copy of the
manufacturing label on the inside of the cabinet, typically stuck to the
right wall near the front. In addition, a small warranty sticker
(also with the serial number) is often affixed to the front of the
cabinet below the coin door.
Original manufacturer's warranty sticker with the machine's
serial number, typically placed on the front of the
cabinet under the coin door.

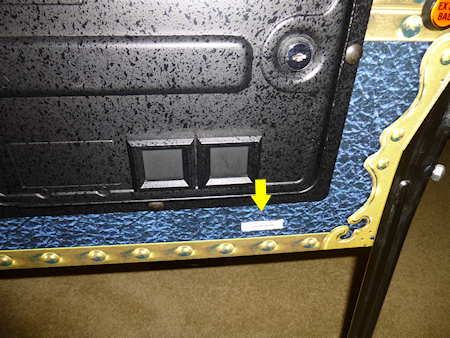
Backbox warning label
Most pinball machines have a warning on the back of the backbox
cautioning operators to fold down the backbox for transport. The
typical 1990s label is shown below. You can reproduce it (or
something similar) for another bit of added authenticity.
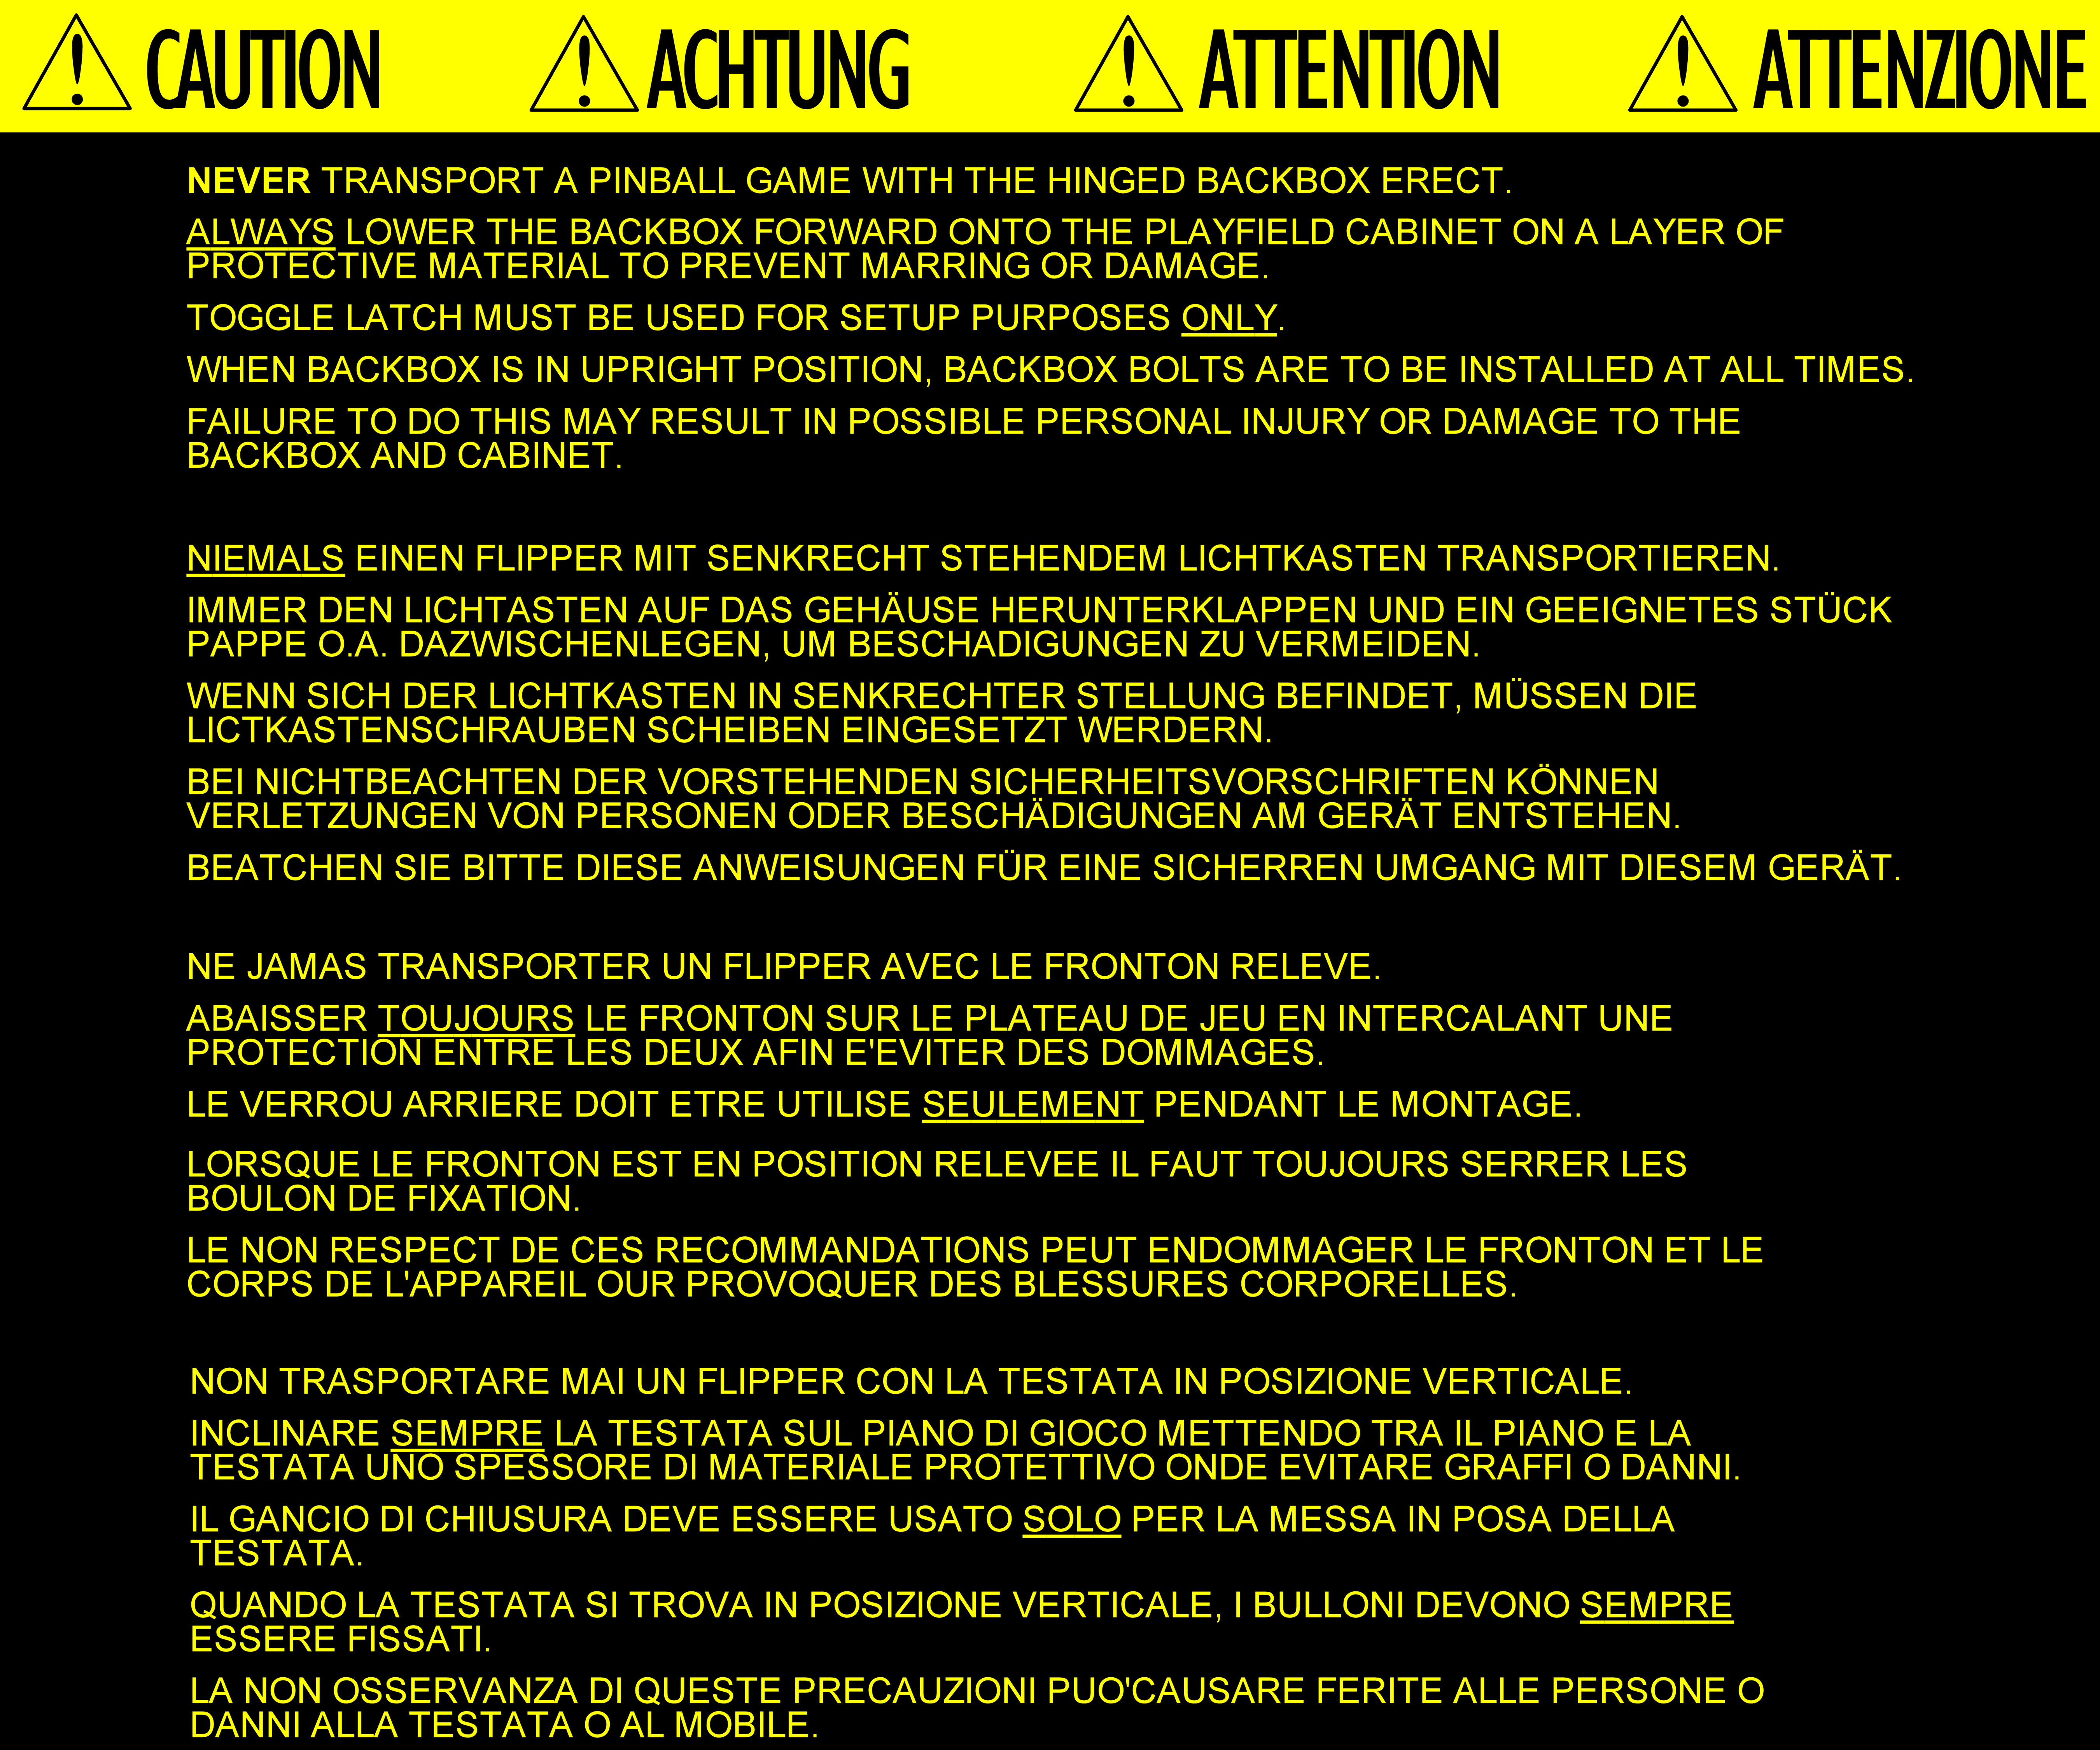
This is normally printed at 18" wide by 15" high, on the back of the
backbox (the exterior side), roughly centered. On the original
machines, it was screen-printed, but that's prohibitively expensive
for most pin cab builders. A more economical alternative is to use a
printed vinyl decal as with the side art. Pre-printed decals with the
standard warning text can be found online; search for pinball
backbox warning decal. If you're having custom decals made for
your side art, you can probably have a custom copy of the backbox
label made at the same time.
Custom plunger knobs
This mod is popular with pinball collectors these days. Several small
companies make themed knobs for specific titles, such as the Thing
hand knob for The Addams Family, or a golf ball knob for No
Good Gofers. If you based your cab's artwork on a particular real
pinball title, a custom knob designed for that machine would fit
nicely. There are also lots of ball-shaped knobs with metallic
finishes, powder-coat finishes, and hand-painted patterns. You should be
able to find something that matches just about any art theme.
For any of those options, search the Web for "custom pinball shooter knob".
In keeping with the DIY spirit of the pin cab project in general, I
like the idea of creating your own completely original shooter knob.
This is actually pretty easy thanks to the availability of "knobless"
rods. These are standard plunger rods, just without knobs at the end.
Drill a hole in whatever you want to use as the knob, and epoxy it to
the end of the rod. Combine this with 3D printing and you can fairly
easily create a custom shooter with any theme-appropriate toy for the
knob.
The knobless rods are available from any of the big pinball supply
vendors; look for part 20-9253 (with no additional number like "-1" at
the end) or search for "knobless shooter rod".
Lighted knobs
You can also find knobs with embedded LEDs that light up the knob from
within. The ones I've seen are based on the modern Williams-style
ball shooter assembly, so they should work on a virtual cab just as well as
on a real one. Search for "illuminated pinball shooter rod".
Music jukebox mode
If you installed a decent set of speakers and amps in your cab, you
can get double duty out of them by turning your cab into a music
jukebox when it's not playing pinball.
I don't have any particular recommendations for jukebox software, but
any Windows music player with a visualization mode should work.
Most people who do this set up the music player as a "system" under
their menu system front end - that is, as though it were another
pinball program like Visual Pinball or Future Pinball. A "system" in
the front ends serves as an association with a Windows program (an
application .exe file) that lets you launch that program to run any
game listed with the system. Then you just create a pseudo "game"
that represents the player and add it to your game list. To launch
into music mode, you just navigate to the pseudo-game entry and launch
it like any other game; that fires up the music program that you
associated with the system.
For specific recommendations for music players and details on
setting them up with the front ends, search for "jukebox" on the
vpforums pin cab forum.
