End Notes
Acknowledgments
Many thanks are due to the members of the virtual pin cab forums at
vpforums. My own build would never have gotten
off the ground if the forums hadn't inspired me with lots of great
examples of what you can accomplish, and I wouldn't have made it very
far without the forums' collective expertise to draw on. This is one
of the most helpful and on-topic online forums I've ever encountered,
with a dedicated group of regulars who go way out of their way to help
the newbies and solve the tough technical problems that inevitably
come up in a project this complex. A lot of the information in the
Cabinet Building section of this book came more or less directly from
forum discussions; my main contribution here was to organize it into a
more accessible format. As much as the forums are a gold mine of
useful information, their free-form discussion format makes it
extremely difficult to find specific topics that were discussed in the
past. I hope that this guide is at least a little easier to navigate
than old forum threads.
Another big thanks to the open-source developers who created and
continue to improve the collection of software that makes virtual cabs
possible: Visual Pinball, VPinMAME, DOF, and B2S. I especially want
to thank them for keeping it all open-source. That helps ensure a
strong future for these projects, by empowering their user communities
to improve them and build upon them.
Colophon
This book as you see it in your browser is generated from "source
code" via a set of php scripts purpose-built for this application.
The scripts take my source material, written in a simple ad hoc
markup format, and generate the styled HTML.
The original motivation for the custom scripts was more than just for
the sake of formatting. The real reason for custom scripts was that I
planned to let you generate a highly customized subset of the
material, based the unique combination of features you planned for
your cabinet. The idea was that there are so many ways to build a
virtual cab that it can get overwhelming to wade through the
instructions for everything, so I thought I could organize it
better by letting you set some filters to select only the features
that were interesting to you. As I wrote the material, though, I
could see that there's much, much more material that's common to all
pin cabs than there is unique feature-based material, and I also
realized that there are so many necessary cross-references that I
couldn't safely filter out very much without a risk of links that go
nowhere. Finally, when I stepped back and thought it about some more,
I saw that this idea about filtering was a misguided attempt to
reinvent a wheel. Book writers have been organizing complex material
for centuries, and tools like the Table of Contents, Index, and
cross-referencing are already known to work pretty well when applied
competently.
Most people (myself included) prefer to view technical material like
this online, where it can be easily searched and where cross-reference
links can be immediately followed, so my scripts are designed
primarily with Web browser presentation in mind. However, I still
have an old-fashioned affection for printed books, so I also tried to
arrange things to produce pleasing hard-copy results. If you click
the little Printer icon at the bottom, it will append all of the
chapters together into a single (rather large) document that you can
send to your printer to make a hard-copy edition.
A few people have asked about the CAD model that I used to generate
illustrations throughout this book. Unfortunately, there's no
practical way for me to share it, because it's based on an old
proprietary software package that's no longer available, and it
doesn't convert well to more modern formats (I've tried). Besides,
most of the people who have asked were hoping to use some of the
components for 3D-print manufacturing or at least for taking detailed
measurements for planning purposes, but I'm afraid the model isn't
accurate enough for those purposes. I only made it close enough to
look about right in the illustrations.
Notes on the section photos
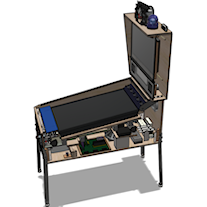 |
Cutaway view of a CAD model of a virtual pinball machine, used as the basis for many illustrations throughout this guide | ||||||||||||

| Start button from a Whirlwind pinball machine (Williams, 1990) | ||||||||||||
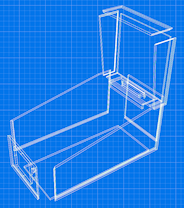 |
3D rendering of plans for a standard-body pin cab replicating the Williams/Bally "WPC" cabinet design of the 1990s | ||||||||||||
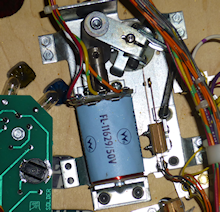 |
A flipper assembly (the parts under the playfield that actuate the flipper), from a Williams machine circa 1995 | ||||||||||||
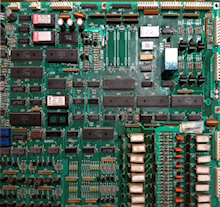 |
A Williams System 11 CPU board, which contains the main control electronics used in Williams pinball machines manufactured circa 1986-1990; in many ways, it amounts to a stripped-down 8-bit personal computer from the Apple II era | ||||||||||||
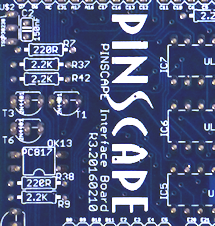 |
Closeup of an unpopulated main interface board for the Pinscape expansion boards | ||||||||||||
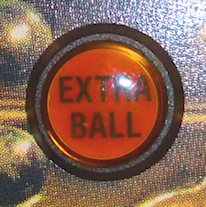 |
The Extra Ball buy-in button from Theatre of Magic (Bally, 1995) |
